Turkey - Sari Bair
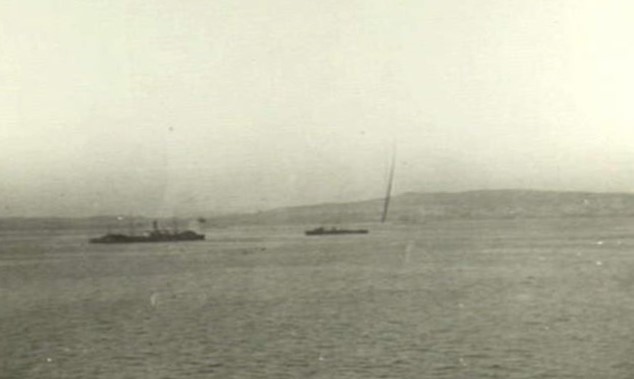
Gallipoli Peninsula, July 1915 – the mountain of Sari Bair and its descent to Suvla plain, which at that time had not been occupied by Anzac forces (photo: Charles Edwin Woodrow Bean).
The Sari Bair Ridge is a mountain range on the Gallipoli peninsula, Turkey, rising to nearly 3000 feet and running roughly parallel to the coastline. In August 1915 it was the scene of a fierce battle between the Allied Forces and the Turks.
We are grateful to Alex Naughton, great-grandson of Cyril Sladden, for providing an account of the battle in which his great-grandfather was wounded.
The great mountain mass of Sari Bair rises from the sea coast to a height of nearly a thousand feet. Seen from the sea its crest line is formed by a ridge which rises into three distinct summits. The principal and north-eastern peak is known to the Turks as Koja Chemen Tepe, and was marked on the British maps as Hill 971. At the south-western end of the crest line ridge is a somewhat lower peak, Chunuk Bair. Midway between these two peaks the ridge rises in another peak, known to the British as Hill Q.
From this crest line the sides of the mountain run steeply downward to the sea. The mountain sides have been carved by natural forces into deep gullies with prominent intervening spurs. Gullies and spurs alike are rocky and precipitous, partially covered with low scrub.
At the first landing in April 1915, the Anzacs had fought their way up the south-western slopes of this mountain and had established a position halfway up the slope, facing up towards Chunuk Bair; a position roughly semi-circular, with both flanks resting on the sea and supported by the guns of the Fleet. Around that position much hard fighting had taken place. Considerable forces of the enemy had been brought up to face the Anzacs, and direct advance up the mountain towards Chunuk Bair was barred by lines of trenches, strongly defended and heavily wired. In that direction the deadlock was complete; but on the sea edge the Turkish defences were less strong. There the Turkish positions were exposed to the close fire of the ship’s, and the fortifications were as a consequence less elaborate and continuous then they were inland.
Consequently it was decided that the attack from Anzac against the Sari Bair position should be made not directly up the mountain side but by a turning movement from the sea coast. First the Turkish trenches on the sea coast north of Anzac should be captured by a sudden attack; then should follow the decisive attack. The force detailed for the capture of the height should move from Anzac northwards along the coast, through the captured positions, until clear of the Turkish defences; then wheeling to the right, the attackers should climb the mountain side, seize the crest and thus take the Turkish defences from the rear.
The force was a strangely composite one. It consisted of the New Zealand and Australian Division of the Anzac Corps, the English troops of the 13th Division, an Irish Brigade from the 10th Division and the Gurkha battalions of the 29th Indian Brigade. These last, celebrated for their prowess in hill warfare, were intended to lead the way up the mountain slopes.
The 39th Brigade, including the 9th Worcestershire, were at first held in reserve, and formed the left supporting column intended to ascend the mountain by way of the Aghyl Dere.
The attack of the covering troops on the Turkish defences at the foot of the slopes planned to start at 20:30 on the 6th August 1915. As soon as these hostile defences had been captured the remainder of the force was to advance. It was intended that the mountain side should be climbed during the night and that the crest line should be seized by dawn on the 7th August.
The 9th Worcestershire remained at the resting shelters at Canterbury Gully until nightfall on the 6th August. At 1400 that afternoon the operations against Lone Pine began with the firing of three mines. No immediate attack followed, but the gun fire of both sides increased in rapidity, until at 1630 the Anzac artillery opened an intensive bombardment. Every gun in the Anzac area came into action and from the ships at sea great shells came over. On the northern flank from 2030 onwards the covering troops attacked and captured the Turkish defences along the northern shore. The battalions of the 39th Brigade assembled in Canterbury Gully and moved off at 2300. The 9th Worcestershire formed up at 1900. They moved off in column of route over the neck east of Plugge’s Plateau, and thence down towards the sea shore at the mouth of Reserve Gully. Orders were that the Brigade should march northwards along the sea coast track to the mouth of Arghyl Dere. Thence the Brigade would advance up that gully to the crest. However as the leaders of the column reached the sea coast track they found the way ahead blocked by the 29th Indian Brigade. They in turn had been held up by the Australian Brigade in front. They remained in the Dere all day. At 2100 after a meal and having left their iron rations, packs and haversacks behind, the Battalion set out in ultra light order. The passage was very narrow and entirely blocked by mules and native drivers. Headway therefore was very slow and a lot of confusion resulted. Eventually on the 8th August they reached the top of the Dere and they took up position near to the top of the ravine.
On the 9th August the British attack was a failure and preliminary bombardment was carried out by two cruisers and when the 9th Worcestershire’s advanced they also got bombarded by our guns. As a result they withdrew with loss to the original positions. On the 10th August just before dawn the Turks attacked. Heavy casualties resulted. By 0700 Lieutenant Colonel Nunn, Major Grafton and Major Boyd-Moss, Captain Rolph and 2nd Lieutenant Lancaster and E.L. Hiscock had been killed. Major Barker, Captain Horsfield, Lieutenants Neame and Bellairs and 2nd Lieutenant Marshall wounded. The Battalion then retreated.
On the left flank the garrison of “Gurkha Redoubt” commanded by Captain W.D. Gibbon, beat off all attacks and maintained their position until darkness fell. They inflicted heavy loss on the enemy with their machine guns; and indeed the Turkish loss was enormous. The dense waves of their battalions as they plunged down the slope were smashed by the shells of the Fleet and raked from Rhododendron Spur by the New Zealand machine gun battery. The Turks fell in swathes and soon their attack withered away. However they had achieved their objective and recaptured the crest of Chunuk Bair and had driven the British attacking troops back from their goal.
In the evening, finding communication with the rest of the Battalion impossible, the party in Gurkha Redoubt retired; on their way back they stopped to remove the wounded. After the main body of the Battalion had retired, they were reformed in the rear of Captain Munnick.
Meanwhile every available man had been ordered up from reserve. In the end they left their positions and fell back to the ravine. Captain Munnick could only now muster 70 men. Lieutenant C.E. Sladden with 20 men then went forward at 0900 and held the line originally occupied by the Battalion at dawn. He retired that evening, joining the Battalion which had now been sent down the Dere.
In the Arghyl Dere the Battalion reorganised during the night. Captain Gibbon assumed command, with Captain Munnick as adjutant. The other surviving officers were Lieutenant G.T. Pearson, Lieutenant C.E. Sladden and the Quartermaster C.H. Inwood. A reinforcement of about 100 men under 2nd Lieutenant R.T. Cavanagh arrived during the night, and eventually the strength of the Battalion was found to be 360 of all ranks. Lieutenant Pearson commanded A and B companies. 2nd Lieutenant Cavanagh commanded C and D companies and Lieutenant Sladden was in charge of one machine gun. Throughout the 11th August the 9th Worcestershire remained in the Arghyl Dere in reserve resting and reorganising.
The attempt to gain the crest of the Sari Bair by direct attack was abandoned by the British commanders. However it was still hoped to win through via a turning movement from Suvla on the northern flank. The forces at Suvla and Anzac were separated by some two miles of open country, the wide valley of Asmak Dere. This low ground was bounded on the north by a ridge known as the “W” Hills and on the south by a gentle rise known as Hill 60. Both these high points were still commanded by the Turkish forces.
Hill 60 lay half a mile beyond the left flank of the Anzac force. This left flank now held Damakjelik Bair, which had been the most northerly point seized on the night of the 6th August by the covering force before the great attack. The defence of this had now been taken over by the 6th Gurkhas. Down in the little valley between Damakjelik Bair and Hill 60 runs a stream, the Kaiajak Dere, with good water and a well, the Kabak Kuyu “Cabbage Well”. With water being a precious commodity it was decided to secure the well and attack Kabak Kuyu. The 9th Worcestershire were selected from the reserve to lead this attack.
At 1800 on the 12th August Captain Gibbon with 250 men (100 men were left behind in reserve under the Quartermaster) and his four remaining officers marched from the reserve position in the Arghyl Dere to Damakjelik Bair. It was intended that the attack should be made just before dark and that a position covering the wells should be entrenched during the night.
At 1930 the Battalion advanced in two lines with bayonets fixed and safety catches back. The enemy immediately opened fire which wiped out the attack before anyone could close with the enemy. Captain Gibbon, then rallied his men, now about 100 strong, and made a second charge, in one line this time they came within bomb throwing distance of the enemy but once again were repulsed. All the officers were casualties. Lieutenant Pearson was killed and Captain Gibbon and Captain Munnick, Lieutenant Sladden and 2nd Lieutenant Cavanagh were wounded. The remnants then withdrew to the Gurkha lines.
As a result Lieutenant Sladden, who had received a gunshot wound to his left shoulder which had fractured the humerus, and the other wounded were evacuated from the Peninsular. Lieutenant Sladden was sent to recover in hospital in Malta. He rejoined the 9th Worcestershire’s in September 1915.
Meanwhile on the 13th August the remains of the Battalion rejoined those 100 men held in reserve under the Quartermaster, Lieutenant Inwood. However only 200 of the 9th Battalion could be mustered. As a result, as a temporary measure, the 9th Worcestershire were amalgamated with those of the 7th Gloucestershire to form a temporary battalion. Fighting had now died down and the troops rested in Arghyl Dere back with the 39th Brigade.
Letters mentioning this place: